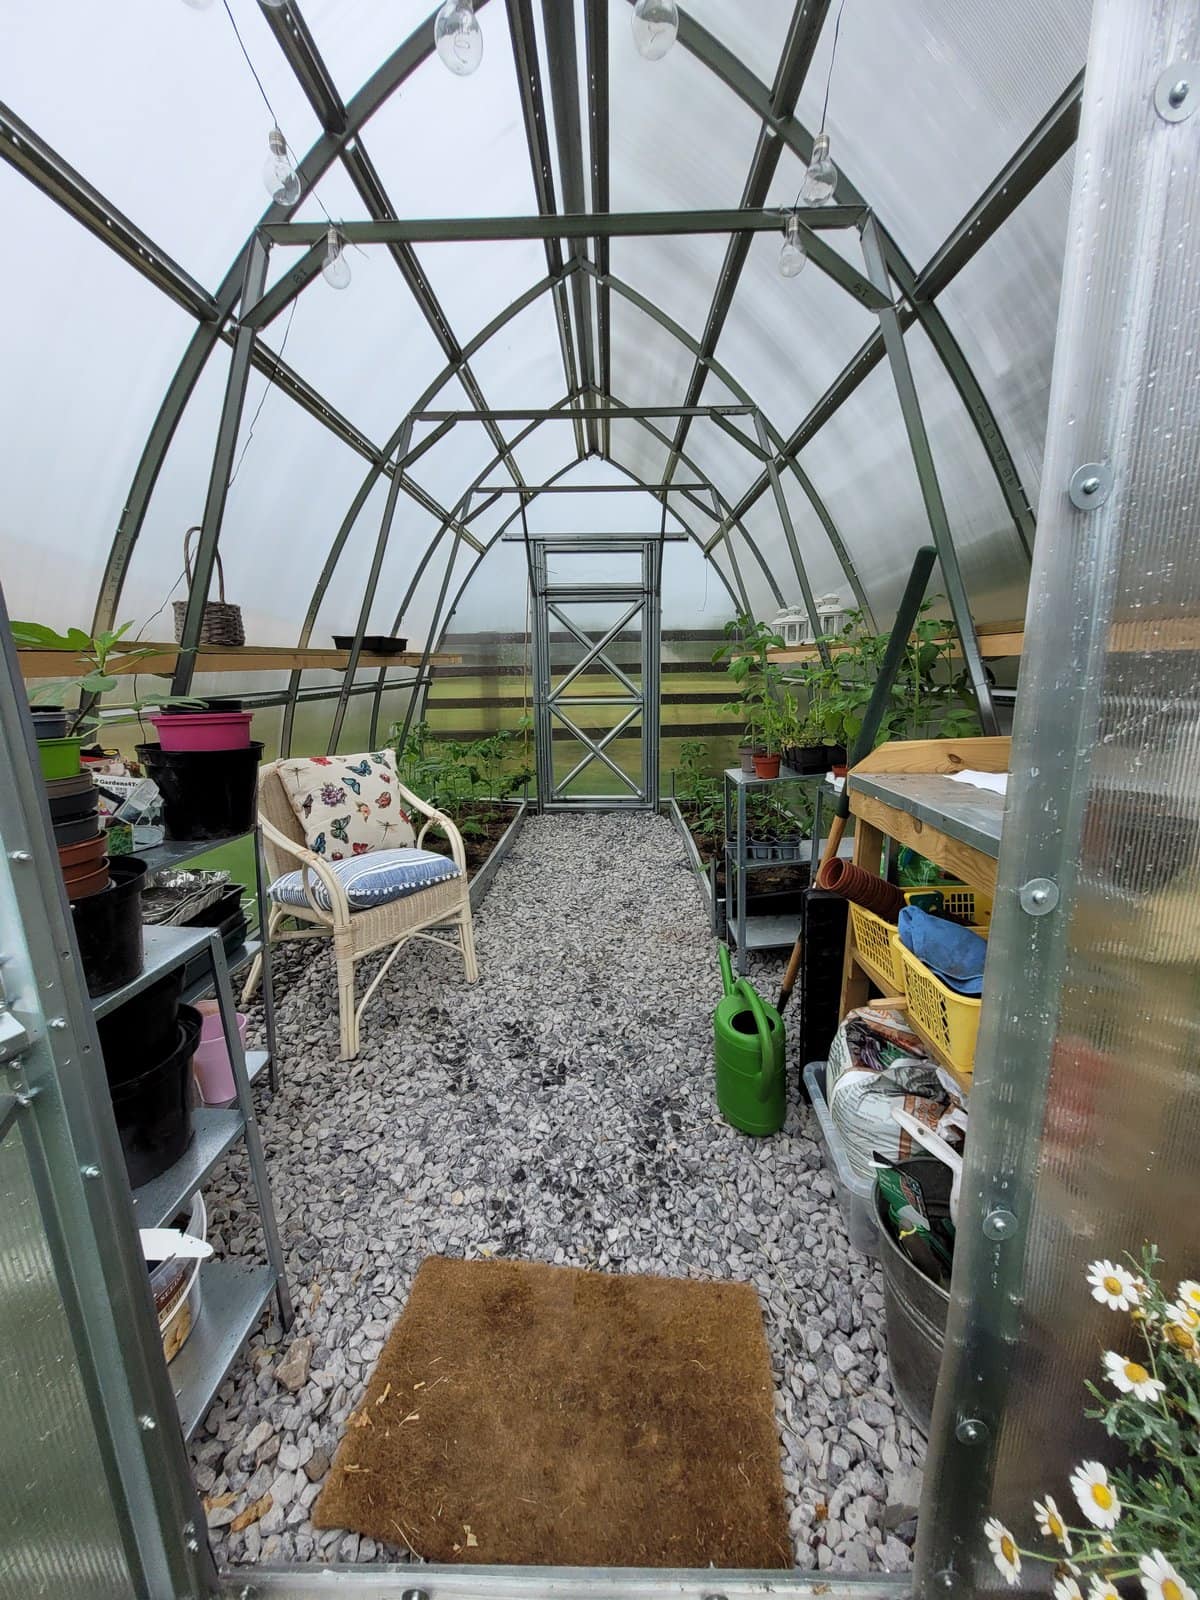
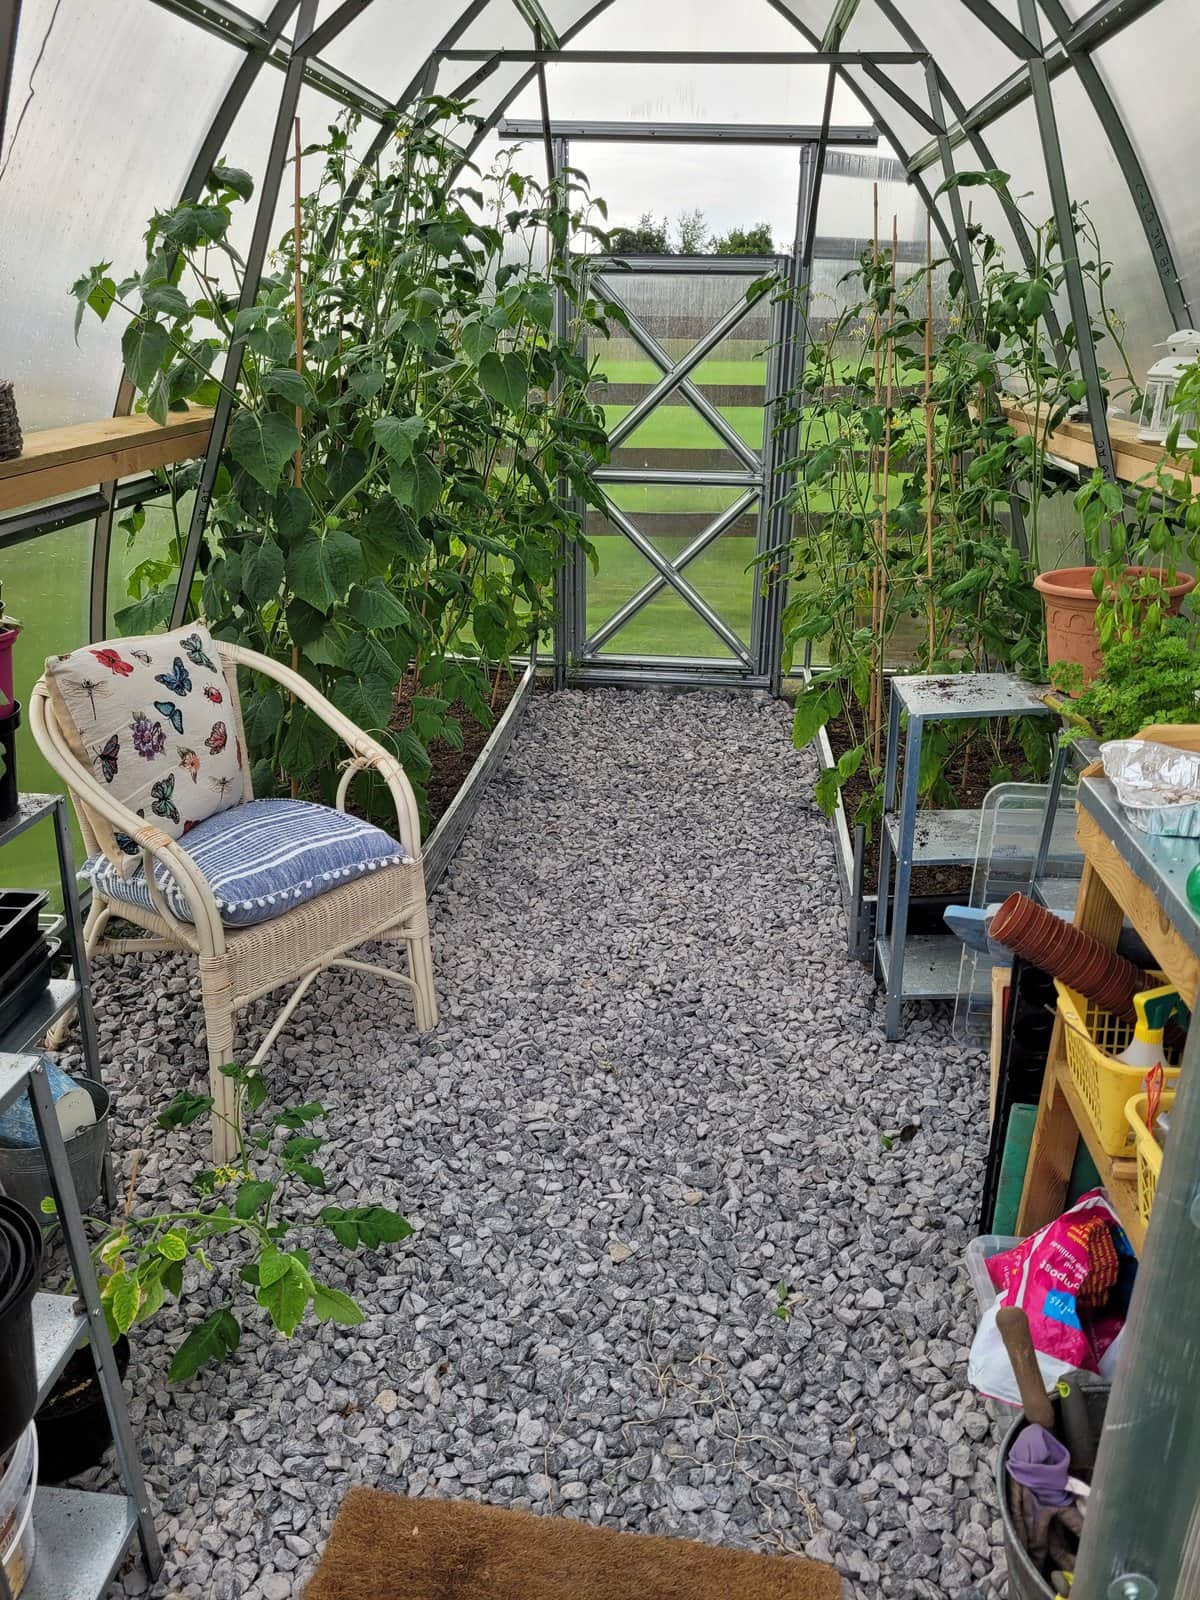
Originally, I purchased my greenhouse as a potting shed meets she-shed meets propagation shed. I really didn’t have huge ambitions about growing lots of seedlings. The truth is, its main use is still a little hideaway for myself. It is 2.6 x 4m and has turned out to be the perfect size for me. There’s plenty of space for all my seedlings and having a permanent spot for all my gardening bits and pieces is a game changer for me.

How we chose the greenhouse site. You need to ensure it has plenty of sun so check the area isn’t shaded by walls or the house. We had an apple tree we had to cut back quite a bit to keep the greenhouse safe from potential storm damage.
The ground should be level but where there is a slight slope, try and get the ground as level as you can – more on this below. Where the slope is not avoidable, you can orient the greenhouse across the slope.
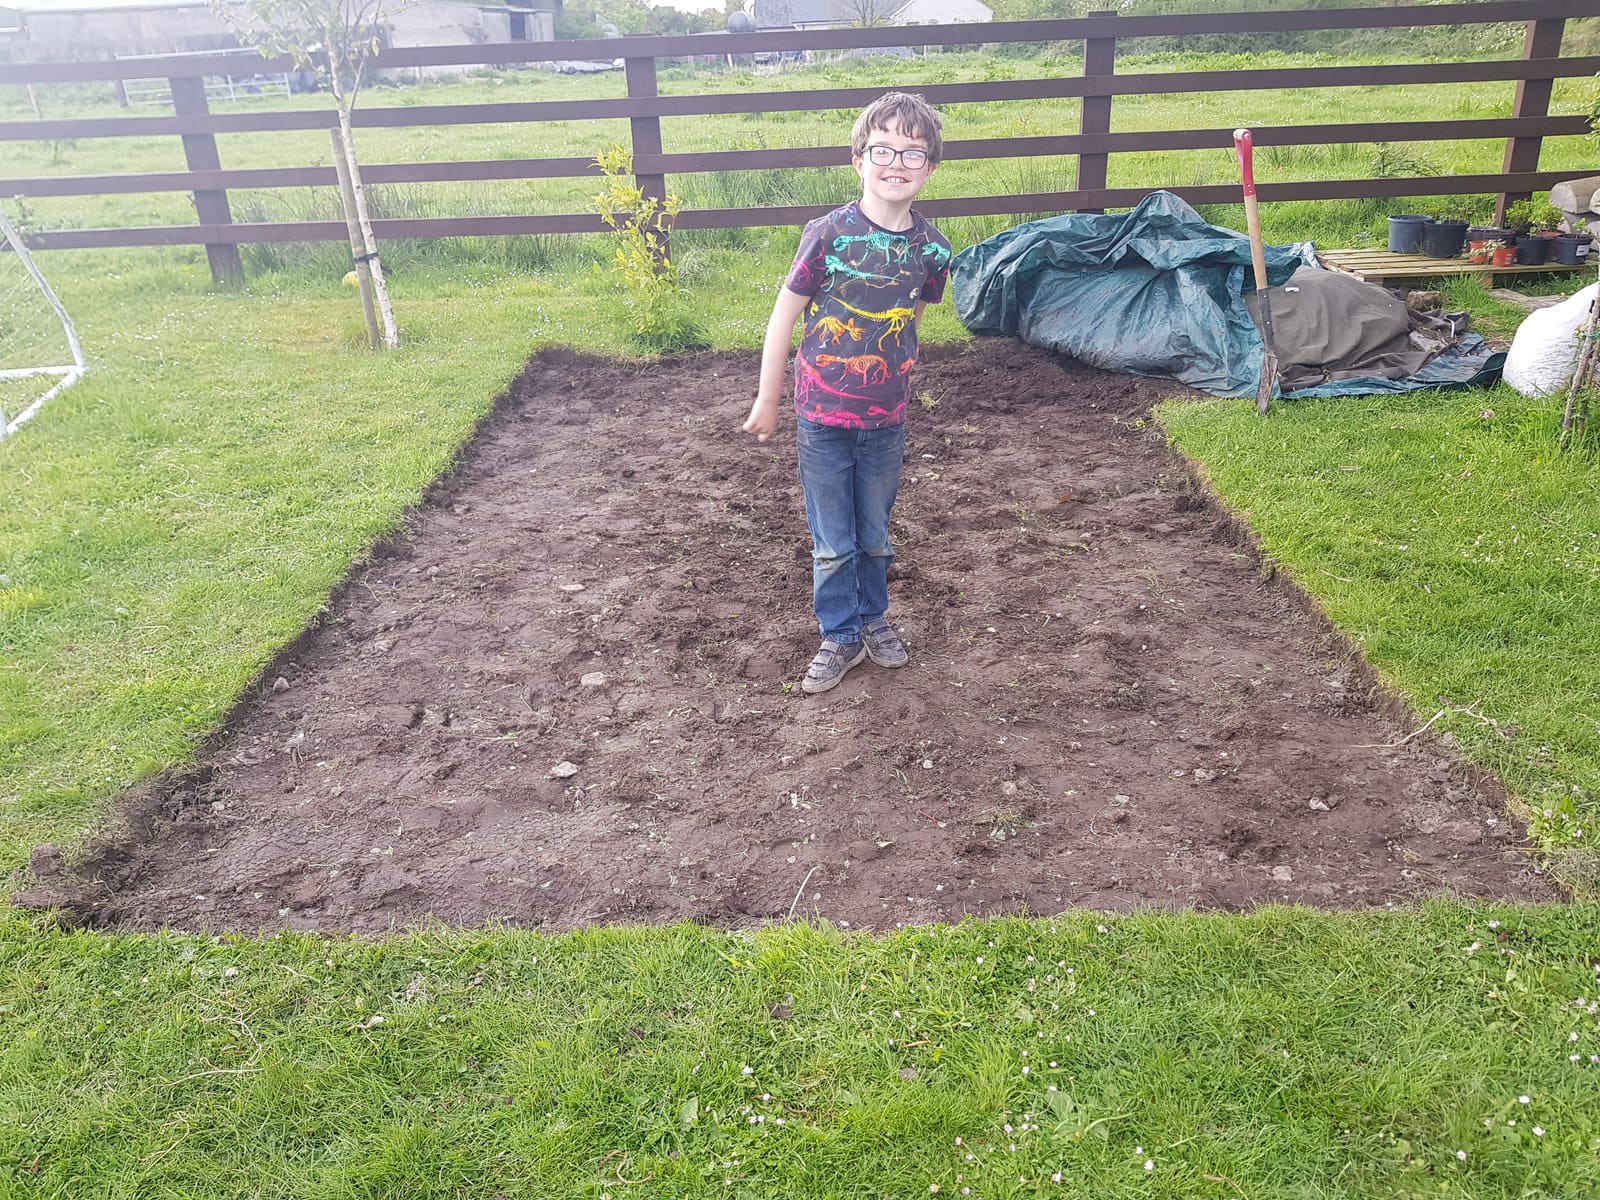
Once we picked the spot, we marked out the footprint of the greenhouse on the grass and began to remove the turf. This is done using a spade, “cutting” a square or rectangle shape, then sliding the spade under that piece of turf and lifting it off*.
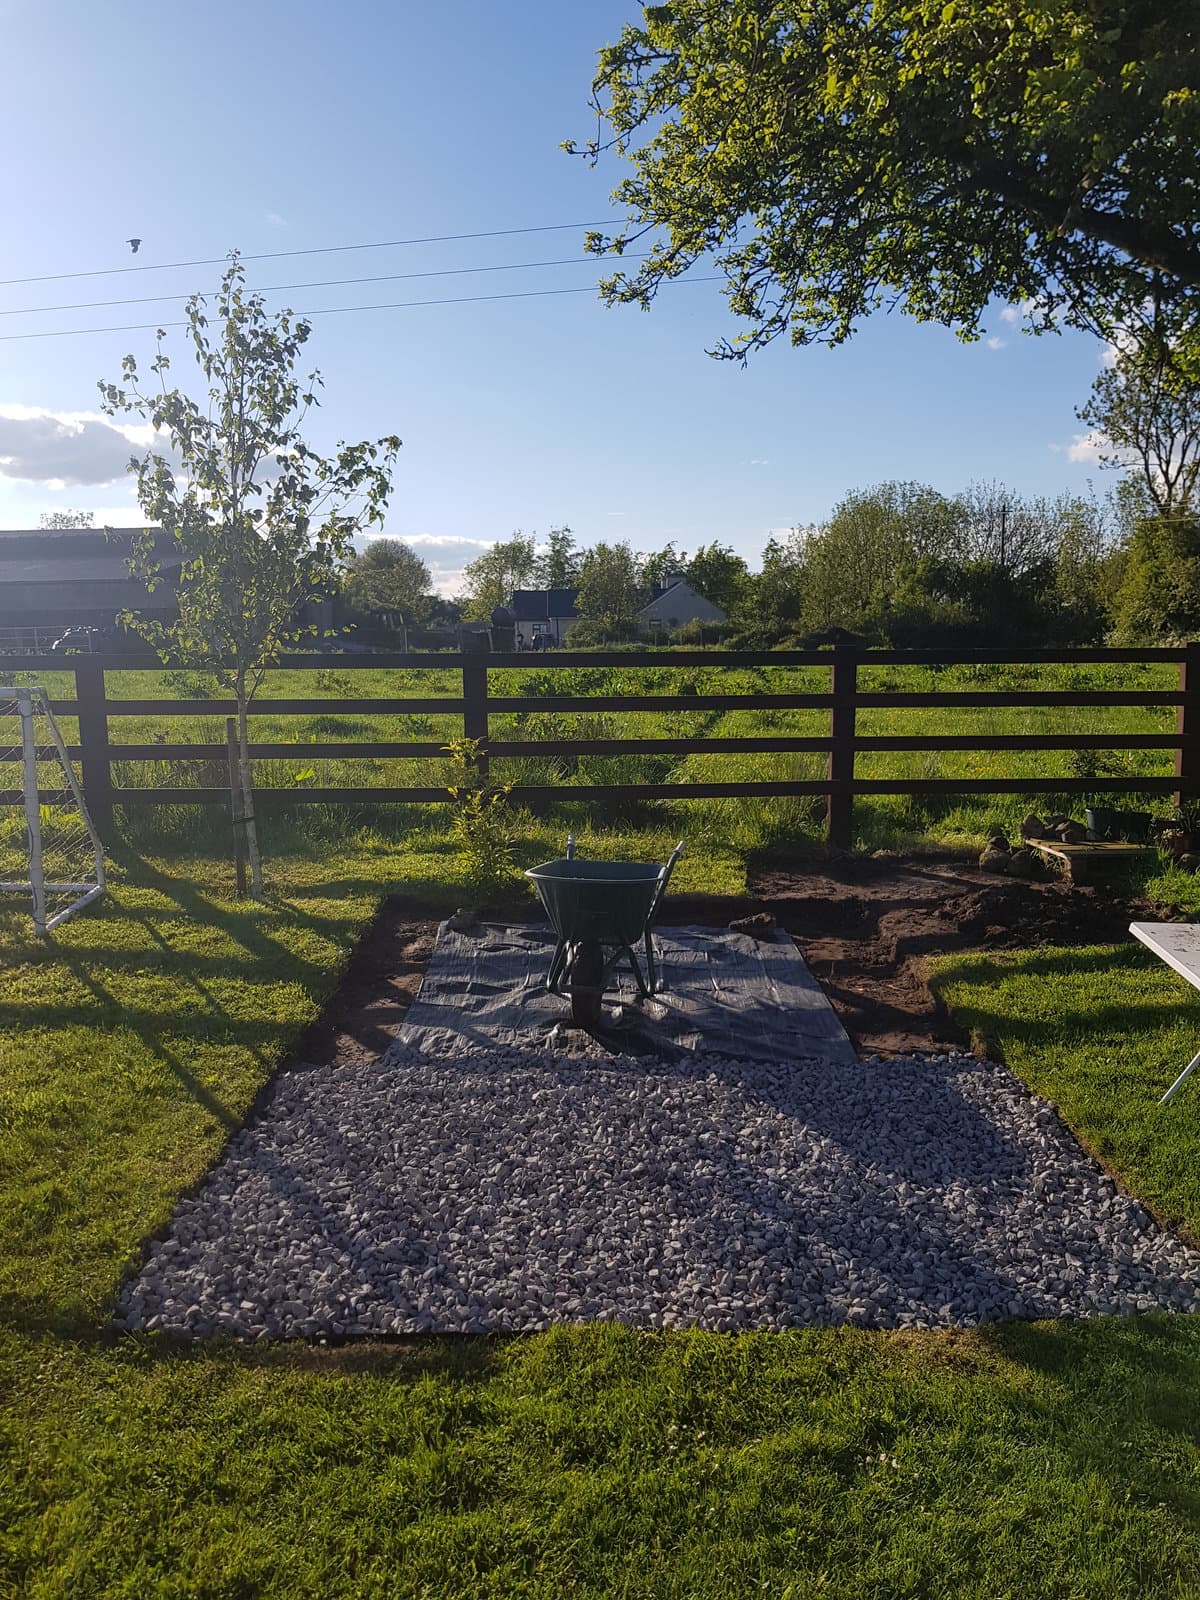
Since my greenhouse was part seedling home, part she-shed, I knew I wanted an area for my potting bench, pots and seedlings and a spot to sit (i.e. hide) with a cuppa. With that in mind, I was going to have quite a few areas that I wanted to keep unplanted, so we laid weed membrane fabric in these areas and topped up with stone.
The stone we used was left over by the builder from laying paths and is what he calls ‘hardcore’ (basically large sized limestone gravel). My initial intention (bearing in mind the she-shed idea) was that we would eventually put slabs or tiles down but in all honesty, now that it is in place a couple of years, I really don’t think we will bother. The stone works perfectly well for us.
It was not strictly necessary to remove the turf but doing so allowed us the opportunity to level the ground by taking a little more soil with the sods and using the stone to create a more level platform more easily. The alternative would be to simply put cardboard down where you intend to put the raised beds and put soil directly on top using a ‘no dig’ style approach.
Once it was up, I kitted it out with metal raised beds from the same supplier, a wooden potting bench and Hyllis shelving from IKEA. I had looked at traditional staging but they were more expensive and I’ve gotten on fine with these.
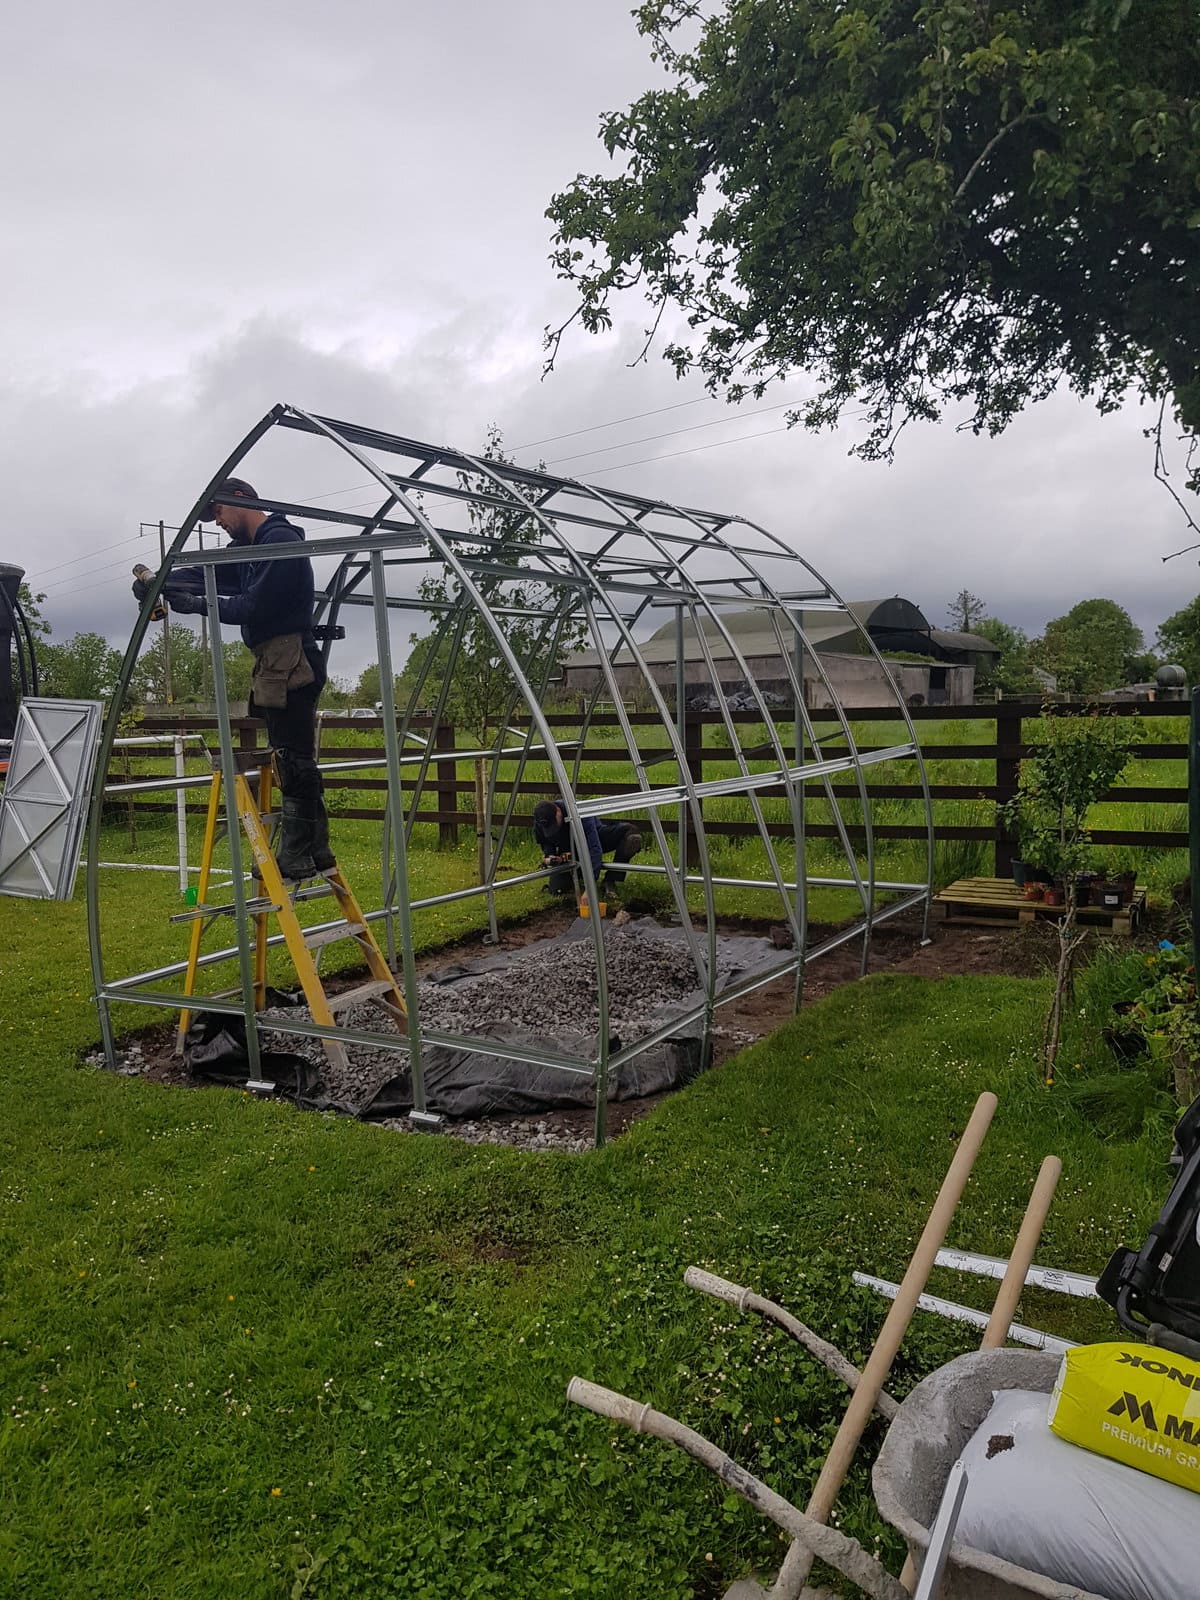
As I mentioned we got the suppliers** of our polycarbonate greenhouse to assemble it and this was definitely well worth it. We chose a ‘gothic’ arch style shape because I liked the look of it (she-said, remember 😊) but one with straighter sides and a pointed or rounded roof would definitely allow more shelving and better space for taller plants. I don’t regret my decision at all though because I still love the look of it.
*What to do with the removed turf? If you can find a spot to stack the sods upside down on top of each other, the grass eventually breaks down and you have fabulous topsoil to top up your borders and raised beds with after a few months.
**We purchased our greenhouse from KSB Greenhouses, based in Longford, Ireland. It’s a KSB Arrow Polycarbonate Greenhouse (2.6 x 4m).